How to Bake Sourdough (With and Without a Dutch Oven)
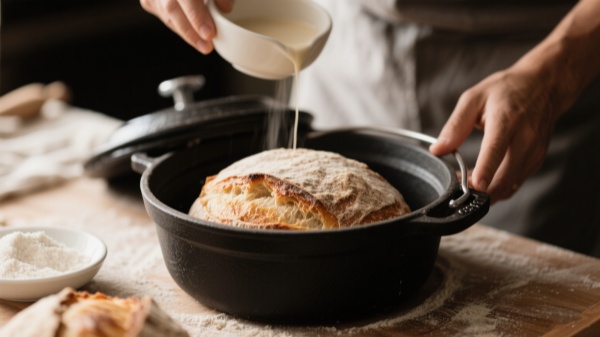
A Dutch oven makes sourdough easier — it traps steam and simulates a pro oven — but you don’t need one. Below you’ll find a compact Dutch‑oven method plus several reliable alternatives that create the same steam and heat environment for great oven spring and crust.
Published Sep 5, 2025 · Solamex Editorial
Why Steam Matters
Steam delays crust formation during the first minutes of baking, which lets the loaf expand more (better oven spring) and gives a glossy, thin crust that cracks pleasingly. Whether you trap that steam in a lidded pot or generate it in the oven with other methods, the goal is the same: a short, humid initial phase followed by a dry finish that browns the crust.
Quick Dutch-Oven Refresher (if You Have One)
Use this as a compact, reproducible recipe for most home loaves. I expanded this section with extra tips and options so you have more to work with when you want consistent results.
Why a Dutch oven helps
A heavy lidded pot preheated with the oven traps the loaf’s own moisture, creating a mini steam chamber. The pot’s mass keeps heat stable during the initial bake, which improves oven spring and produces a crisp, blistered crust.
Ingredients (single medium loaf — baker’s weights)
- Flour — 500 g (100%)
- Water — 350 g (70%)
- Salt — 10 g (2%)
- Active sourdough starter — 100 g (20%)
Expanded step-by-step (Dutch oven method)
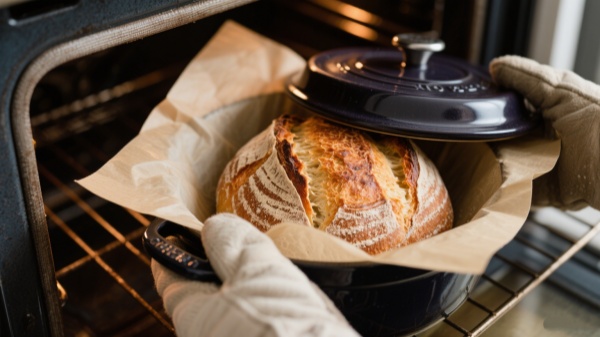
- Preheat thoroughly. Put your Dutch oven (lid on) in the oven and preheat to 450°F / 230°C for 30–45 minutes. Use an oven thermometer if you have one — many ovens run hot or cool.
- Shape and score. Shape your loaf on a piece of parchment, use a sharp lame to score the surface, and be ready to move quickly once the pot is hot.
- Load safely. Lift the hot pot from the oven (use heavy gloves), drop the parchment with the dough in, put the lid on, and return it to the oven.
- Bake covered, then uncovered. Bake covered for 20–25 minutes to trap steam and boost oven spring. Remove the lid and bake another 15–25 minutes until the crust is deeply golden and the internal temperature reads ~200–210°F (93–99°C).
- Rest before slicing. Let the loaf cool on a rack for at least an hour for the crumb to set properly.
Extra Dutch-oven tips
- Smaller pot = taller loaf: A 4–5 quart pot restricts spreading and can encourage a taller oven spring for medium (500 g flour) loaves.
- Preheat time matters: Heavier pots and stones need 30+ minutes to reach thermal equilibrium; enameled pots heat predictably but check temperature limits for enamel and knobs.
- Use parchment to transfer: Parchment makes loading and removal safer — no hot hands inside the pot.
- Steam hack inside the pot: For very wet doughs, tuck a small oven-safe dish with a few ice cubes in the pot at loading to boost humidity — but be careful with boiling water contact and thermal shock.
How to Bake Sourdough without a Dutch Oven
This is where most home bakers end up: great sourdough is possible without special gear. Below you’ll find several tested alternatives, each with steps, pros and cons, and quick troubleshooting notes.
1) Inverted roasting pan or rimmed sheet trick (cheap and effective)
What it is: Bake the loaf on parchment on a half sheet pan, then quickly invert a second, rimmed sheet or a large roasting pan over the loaf to trap steam for the first 15–25 minutes. Remove the cover to brown.
Why it works: The inverted pan creates a steam chamber that mimics the Dutch oven’s sealed environment.
Quick steps: Preheat the oven and one baking sheet on the middle rack; shape loaf on parchment; slide the loaf and the hot baking sheet into the oven; immediately invert second sheet/pan over it; bake covered 15–25 min then uncover and finish 15–30 min.
2) Heavy casserole or oven-safe pot with lid
Use a deep, oven-safe casserole (glass, ceramic, or metal) with a well-fitting lid. Many casseroles and covered skillets work just like a Dutch oven if they’re oven-safe to 450°F and preheated.
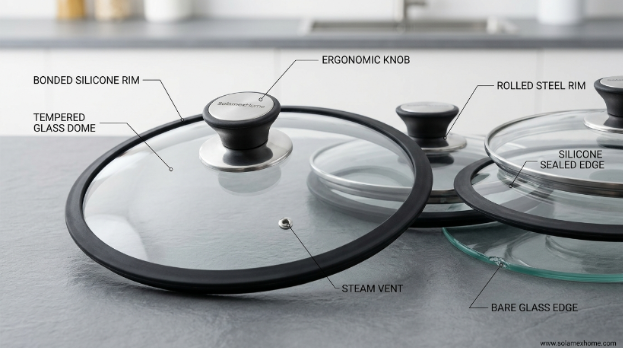
Tip: For glass lids, reduce thermal shock by warming the lid gently or avoid preheating the lid separately.
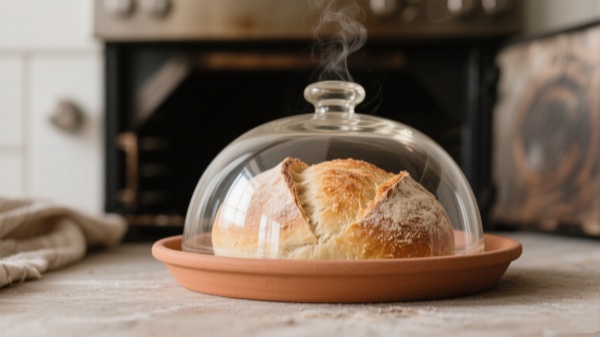
3) Clay/ceramic bread cloche (purpose-built)
Cloche or bread dome is a purpose-built alternative: it’s designed to trap steam and produce consistent crust. Treat it like a Dutch oven — preheat if the cookware manufacturer recommends it.
4) Preheated baking stone or steel + steam tray (pro-style approach)
What to do: Preheat a pizza stone or baking steel on the middle rack for 45+ minutes. Place a shallow metal tray on the bottom rack. When the dough goes in, pour hot water into the tray (or use a kettle) to create a strong burst of steam, or pre-boil water and drop it into the pan — then vent after 12–18 minutes.
Pros: Best radiant heat (excellent crust), close to professional ovens when combined with controlled steam. Cons: Steam must be managed carefully; it’s easier to scald yourself if you pour boiling water in a hot oven.
5) Loaf pan or Pullman (for sandwich-style loaves)
For an evenly shaped sandwich loaf or when you prefer a fine crumb, bake in a loaf pan and add steam with a tray of boiling water. The shape changes and crust will differ, but you’ll still get good structure.
6) Double-sheet or two-pan clamping method
Place the dough on parchment on one rimmed sheet and clamp it with an inverted second sheet for the initial steam phase. This is a widely shared home-bakers trick and works well for most ovens.
7) Budget “bread pots” and cheap enamel options
Many budget enamel bread pots and small cast-iron bread ovens (available at big-box stores) are sold specifically to give home bakers Dutch-oven–like results at lower cost. They’re worth considering if you bake frequently.
| Method | Steam quality | Radiant heat | Cost / Ease | Best for |
|---|---|---|---|---|
| Dutch oven | Excellent | High | Medium / Easy | Artisan loaves |
| Inverted pan | Good | Medium | Low / Easy | Budget bakers |
| Stone + steam tray | Good (timed) | Excellent | Medium / Moderate | Pro-style crust |
| Cloche / casserole | Very good | High | Medium / Easy | Regular artisan baking |
| Loaf pan | Fair (with steam) | Medium | Low / Very easy | Sandwich loaves |
Sourdough-Specific Notes (Proofing, Hydration, Scoring)
These points apply whether you use a Dutch oven or any alternative.
- Poke test: Gently press the dough; a slow spring-back indicates ready-to-bake. Too quick = underproofed; too slow = overproofed.
- Hydration: Higher hydration (72%+) gives a more open crumb but needs firmer shaping to hold shape when loaded into shallow vessels.
- Scoring: Make decisive, confident cuts with a lame — that directs oven spring where you want it.

- Internal temp: Aim for ~200–210°F (93–99°C) for a fully baked crumb.
Troubleshooting (Common Problems and Fixes)
- Dense crumb / underproofed
- Give the dough more bulk fermentation time or warmer proofing environment; check starter activity.
- Poor oven spring
- Usually a steam issue or weak gluten structure. Try a hotter preheat, more sealed steam (covered), or strengthen dough with slightly longer kneading or folds.
- Crust too dark
- Lower the finishing temperature by 10–20°F or tent the loaf with foil for the final 5–10 minutes.
FAQ
Can I bake sourdough without a Dutch oven?
Yes — cloches, covered casseroles, inverted pans, and stone+steam setups all work well.
What’s the best Dutch-oven alternative?
A well-fitting casserole or a preheated stone with a steam tray—both offer predictable results.
How long should I preheat my pan or stone?
Give heavy pans and stones 30–45 minutes at baking temperature to reach thermal equilibrium.
What size Dutch oven should I buy for home loaves?
4–6 quarts fits most artisan loaves. Smaller (4 qt) tends to help taller loaves for 500 g flour dough.

Solamex — Wholesale Pots and Pans Expertise
Solamex offers wholesale pots and pans, combining durable materials, precise craftsmanship, and flexible product customization. From premium stainless steel to advanced nonstick lines, our catalog is built for both retail distribution and demanding commercial kitchens — ensuring consistency in performance and presentation.
Dutch Oven Bread: A Practical Guide to Stellar Crust—With or Without the Pot
What Size Dutch Oven for Sourdough? The Practical Guide