How to Clean and Remove Stains from Mugs, Bottles, and Tumblers

Introduction
Are nasty residues ruining your morning coffee routine? Everyone hates foul smells inside their favorite travel cups. Learning to remove stains from mugs, bottles, and tumblers transforms dirty cups completely. Follow these simple steps for spotless results. Enjoy fresh tasting beverages every single day.
One of the tiny annoyances in your everyday life is the buildup and organic stains on your go-to mugs, cups, or glasses. Dark stains on a travel mug, funky odors on the lid of your hydration bottle, or a stainless steel tumbler showing wear and tear make your sleek drinkware look less than ideal. Do not worry! Check out these expert tips detailing how to clean tea stains from stainless steel mug.
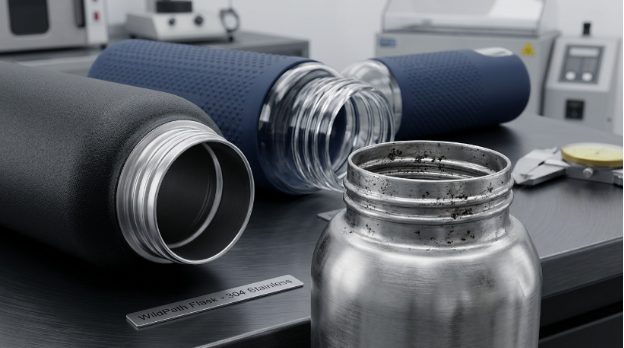
The answer lies in the chemical composition of the liquids and the material properties of the insulated mug, such as a Glass Water Bottle from SolamexHome.
Coffee and tea contain oils and tannins, which are difficult to remove from places like stainless steel. If you do not ensure these residuals are removed properly, you are not only leaving an eyesore; you are welcoming an environment of mold, biofilm, and undesirable taste into your life. These natural compounds are hard to remove, particularly if they have settled into the small cracks of rubber seals or allowed to dry on interior walls.
The problem is that your beloved lids often retain that weird taste even after vigorous dishwasher washing. It does not always mean scrubbing harder; it means employing the appropriate chemical reactions and manual techniques for a safe and efficient clean-up.
Quick Notes
-
Break Free from Hidden Mold: Pry out rubber lid seals weekly and submerge them in hot soapy water to remove hidden biofilm and mold in dark crevices.
-
Use the Right Chemistry: Break organic stains like tea and coffee tannins at a molecular level using sodium percarbonate or denture tablets that eat into the tannins, instead of soap, which is not particularly effective on its own.
-
Avoid Harsh Damage: Do not use chlorine bleach or harsh steel wool on stainless steel, as they cause pitting and the loss of the protective chromium oxide layer.
What You Will Need
|
Item |
Purpose |
|
White Vinegar |
Safely removes mineral scale |
|
Baking Soda |
Lifts stubborn oily residues |
|
Denture Tablets |
Deep cleans organic stains |
In this module, you build the tools and prerequisites required to develop a stock of everyday drinkware that is mint, stain-free, and smells like new. During this revitalizing process, any old, oxidized flavor is removed, harmful bacteria are destroyed, and the useful life of your costly vacuum-insulated appliances will be prolonged, as no permanent odors will build up.
For this deep-cleaning lesson, it takes a few household items and some special tools for narrow or complicated vessels. There is no doubt that having the necessary supplies makes a difference.
The Basics You Are Going to Require
-
Distilled White Vinegar: Ideal for the cleaning of mineral scale and hard water deposits.
-
Baking Soda & Hydrogen Peroxide: The most powerful natural abrasive that lifts out oily coffee residues.
-
Sodium Percarbonate (Oxygen Bleach) or Denture Tablets: A low-cost, yet highly effective alternative to scrubbing narrow-neck bottles.
-
Brushing Tools: A small-diameter bottle brush with a long handle and a narrow pipe cleaner or straw brush for complicated valves. If you ever try to wash down a tall bottle with a kitchen sponge, it does not work out.
-
Sturdy Drying Rack: Ensuring the proper flow of air is essential.
Disassembly And Prep Your Gear
|
Part |
Action Required |
|
Rubber Seals |
Pry out carefully and soak |
|
Straw Valves |
Unscrew completely and scrub |
|
Lids |
Separate all sliding mechanisms |
The first and foremost thing you need to do if you want to properly get rid of stains and odors on your drinkware is to fully disassemble the equipment. Start by taking off the lid, unscrewing any built-in straw valves, and gently levering out removable rubber seals.
CDC hygiene guidelines state that mold thrives in the damp, dark crevices of bottle lids. If you cannot take it apart, you cannot truly clean it. Many of us wet the entire lid under the tap, which leaves a slimy biofilm and effectively makes a small petri dish.
The Importance of Correct Disassembly
-
Prevent the Funk: It may seem tedious to use a butter knife to pry out that little silicone ring, but it is the single action you need to take to help prevent the funk.
-
Reduce Mold Growth Potential: Sliding mechanisms and rubber gaskets must be detached to make sure hot soapy water reaches every surface where bacteria can get to.
-
Initial Soak: Dump all these small parts into a bowl with two cups of hot water and a drop of mild dish soap, leaving them to sit for at least five minutes to clean off surface dirt.
How to Clean and Remove Stains?
1. Vinegar & Baking Soda: A Quick And Effective Combination
Vinegar and baking soda form the best answer to easily remove mineral scale and light stains. It is a safe, natural means to clean hard water film buildup on stainless steel and learn how to remove tea stains from cups naturally. However, remember that while vinegar is great at breaking down calcium deposits, you need to use baking soda to break down oily organic deposits.
The Volcano Method
-
Fill with the Base: Fill the stained mug or bottle with 1/4 cup of baking soda.
-
React: Slowly pour in 1/2 cup of distilled white vinegar. You see heavy foaming as the two chemicals combine and cause the surface debris to rise.
-
Soak and Scrub: Allow the solution to act for 15 to 30 minutes, then scrub off the mineral scale using a soft bottle brush.
-
Rinse: Wash well with warm water, making sure there is no acidic kickback.
2. Denture Cleaning Tablets: Yes, Really!
You may not have thought of it, but denture cleaning tablets act as a real game-changer when it comes to cleaning coffee and tea stains. They are formulated with heavy-duty ingredients designed to clean organic stains and biological grime in spots that are inaccessible for a brush, making them ideal for long, narrow-neck bottles.
Denture Tab Instructions
-
Drop Them In: Place a denture tablet into the stained tumbler or narrow hydration bottle.
-
Add Heat: Refill with warm or hot water to the top of the vessel to start the effervescing process.
-
Allow Bubbles to Work: Allow the mixture to sit for one to two hours, or use an overnight treatment for extremely stubborn, baked-on stains. The tablets release active oxygen that breaks the molecular bonds of the tannins.
-
Agitate and Rinse: For those who do not have a brush, add a handful of dry rice before agitating. The rice serves as an abrasive for non-scarring scrubbing action, allowing you to pour it out and clean well.
3. Quick & Easy: Sodium Percarbonate & Hot Water
If you do not have denture tablets, another extremely powerful cleaning solution is pure sodium percarbonate. Sometimes sold as oxygen bleach or in special cleaning tablets like Bottle Bright, its super alkaline nature can easily remove the most stubborn coffee and tea stains in the shortest time possible, saving you from struggling to figure out how to remove coffee stains from stainless steel travel mug.
Steps for Quick Cleaning
-
Add the Powder: Put one tablespoon of sodium percarbonate in your travel tumbler.
-
Activate by Heat: Fill with very hot water (not boiling) to activate the oxygen release.
-
Soak: Allow the solution to sit for about 30 minutes. The oxygen bubbles physically remove the stain from the metal walls, and you know it worked as the water becomes murky brown.
-
Brush & Clear: Once the mixture has soaked, the previously stubborn residue is easily removed with a bottle brush before rinsing well and drying.
4. Hydrogen Peroxide And Baking Soda: The Heavy-Duty Clean
Hydrogen peroxide and baking soda come in handy for stubborn stains, like coffee and oxidized oils, that simply will not shift on your Stainless Steel Cookware or drinkware from www.SolamexHome.com. The hydrogen peroxide acts as a very light, safe bleach, while the baking soda provides a non-scratching abrasive scrubbing action to shine the stainless steel again.
Tackling Stubborn Residue
-
Make Paste: Mix two tablespoons of baking soda and 1/2 cup of hydrogen peroxide together inside the mug.
-
Apply to Walls: Swirl the mixture around to make contact with the inside stained walls and allow it to set for 30 minutes.
-
Scrub the Interior: After soaking, scrub the interior of the vessel with a non-abrasive sponge.
-
Final Wash: Wash with regular dishwashing liquid and warm water to ensure the entire operation is cleaned up.
Wash The Dirty Zones
Smaller parts must definitely be hand-scrubbed because soaking does a poor job of dealing with sticky, stubborn biofilms on rubber gaskets and complicated straw valves. The only way to get rid of this invisible slime in spaces where mold grows is to physically remove it by means of friction.
Areas to Focus On
-
Straw Valves: Use an extra-small pipe cleaner or a brush designed for straws to scrub the inside of the plastic tubes and bite valves. If you consume protein powders, wash these with chilly water first; using warm water cooks the proteins into the plastic and intensifies the foul odor.
-
Gasket Grooves: Use a small detail brush to scrub the small threadings around the lid and the deep gasket groove where the rubber silicone seal resides.
-
Do Not Scratch: The main body should never be scratched with steel wool or rough abrasive pads. These create tiny scratches in the metal, providing ideal crevices where bacteria hide later, so you want it to remain totally smooth.
Rinse And Completely Air Dry
Wash each part with warm, clean water to get rid of any chemical residues and dislodged dirt. The way you dry your drinkware is as crucial as the way you wash it; if the bottle remains moist or humid, bacteria start growing inside within 24 hours.
Drying Best Practices
-
Upside Down Airflow: Place the bottle, lid, gasket, and straw upside down on an open, ventilated drying rack.
-
Never Store Wet: Store the bottle completely exposed with the lid off until the next use, and do not screw the lid onto a wet tumbler.
-
Reassembly: After drying completely, carefully put the lid together, ensuring the silicone gasket is flat and fits tightly in the groove to maintain vacuum insulation.
Verification & Common Mistakes
After taking the time to clean the stains from your mugs, bottles, and tumblers, you must make sure the equipment is clean and safe to use.
The easiest way to check if the gear is clean is to sniff the inside, which should be completely free of any scent. If a sour, stale, or metallic smell is detected, it indicates the presence of biofilms or oils, meaning you should do an additional alkaline soak. Visually inspect the vessel for any remaining brown rings at the bottom.
While there are plenty of highly effective ways to clean coffee stains and mold from stainless steel, there are catastrophic mistakes you should keep at bay.
What to Avoid
-
Harsh Chemicals: The number one error people make is grabbing liquid chlorine bleach. Manufacturers state you should never put bleach on any stainless steel product because it attacks the metal, leads to pitting corrosion, and ruins the invisible chromium oxide layer that prevents rusting.
-
Industrial Steel Scrubbing Blocks: Steel wool deeply scratches the inside surface of the stainless steel, dulling the finish and rendering the metal extremely susceptible to further stains and bacteria.
-
Boiling Powder-Coated Bottles: Do not boil the entire bottle in hot water for long periods of time, as the outer layer of paint could peel and flake off.
People Also Ask
What Is The Necessary Frequency For Deep Cleaning A Reusable Water Bottle?
Your reusable water bottle should be deep cleaned at least once a week. Rinsing off every day with running water is needed to avoid surface grime, but a deep cleaning with a brush, soap, and gasket removal keeps hidden biofilm from hardening in the dark crevices of your lids.
Can I Put My Insulated Tumbler In The Dishwasher?
Many insulated tumblers are technically labeled dishwasher safe, yet it poses a risky endeavor for longevity. Bottle lids with well-sealed crevices often collect food and water, causing a funky odor that remains after washing in the dishwasher. Additionally, intense drying breaks the evacuation seal on insulated tumblers, making hand washing the safer, more effective method for maintaining hygiene and temperature.
What Is That Brown Stuff In The Water Bottle?
If you notice dark rings at the base of your vessel, the brown stuff may just be the natural oils and organic tannins of tea or coffee that are stuck and oxidized. The molecular attachment of these stains requires an alkaline cleaner, such as baking soda or denture tablets, to physically change the stain pigments, whereas they remain intact with standard dish soap or acidic vinegar.
Are Denture Tablets Effective At Cleaning Bottles?
Yes, they do an awesome job! Denture tablets serve as a low-price option to clean narrow-neck bottles by achieving active chemical effervescence to remove submicroscopic particles from the metal. This renders them incredibly good for tall bottles where a typical kitchen brush cannot easily reach the bottom.
Next Steps
Since you now understand exactly how to clean and clear spots on mugs, bottles, and tumblers, you establish a consistent practice keeping them looking clean. Prevention is always better than cure, and there are steps you take avoiding that much scrubbing in the future.
-
Clean Immediately After Use: The longer coffee, tea, or sugary beverages stay in stainless steel cups, the more difficult it is to clean the stains. Rinse your mug with warm water as soon as you are done drinking to ward off massive residue accumulation.
-
Avoid Long Breaks Between Servings: Oils and tannins from coffee penetrate the metal if left in the mug for a long time. Try not to consume such drinks beyond a few hours, as marks turn baked-on and become too difficult to wash.
-
Use Soft Water Where Possible: Your stainless steel mug may look cloudy over time since hard water contains strong minerals that cause deposits to build up. Rinse your coffee cup last with filtered, soft, or distilled water to eliminate chalky watermarks.
-
Maintain a Dedicated Kit: Soak lids and gaskets weekly. Keeping a skilled, long-handled bottle brush and a little straw brush by your kitchen sink is highly recommended. You can also use alkaline cleaning tablets or a baggie of dry rice as a gentle shaker abrasive for ludicrously small bottles.
With these simple, expert tips incorporated into your regular cleaning routine, your stainless steel remains spotless. Keeping your drinkware completely dry between uses ensures it lasts longer, prevents hidden bacteria, and delivers better-tasting, fresher drinks daily.
Conclusion
Proper cleaning prevents harmful bacteria and ruined drink flavors. Using effective chemistry helps you remove stains from mugs, bottles, and tumblers perfectly. Always avoid harsh scrubbing pads or damaging liquid bleach. Consistent weekly maintenance keeps your expensive drinkware gear smelling incredibly fresh. Visit our website at SolamexHome today to explore our amazing new Ceramic Cookware collections!
Kids’ Drinkware Buying Guide: Safety, Durability, and Easy Cleaning
Dutch Oven Buying Guide: Uses, Sizes, and Materials