The Complete Guide to Choosing and Using Cookware for Deep Frying
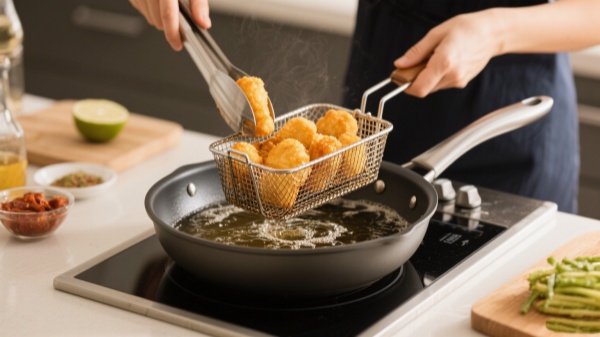
The sizzle of oil, that golden-brown crust forming on your favorite foods—there's something magical about deep frying that no other cooking method quite captures. Yet many home cooks hesitate at the thought, intimidated by bubbling oil or uncertain about which pot to use. Truth is, with the right cookware and a bit of know-how, you can master the art of deep frying in your own kitchen.
I still remember my grandmother's cast iron Dutch oven, darkened with decades of use, producing the crispiest fried chicken I've ever tasted. That pot wasn't just cookware; it was a guarantee of perfectly fried food every single time. Today's options might be more diverse, but the principle remains the same: the right vessel makes all the difference between soggy disappointments and crispy perfection.
Understanding Your Deep Frying Cookware Options
Dutch ovens are our favorite because it's nearly impossible to overload them with food and cause an oil spill, which could be really dangerous. Let me walk you through the main players in the deep-frying game, each with its own personality and strengths.
Cast Iron Dutch Ovens: The Time-Tested Champion
When it comes to deep frying, cast iron Dutch ovens reign supreme for good reason. Cast iron is excellent at heat retention—better than any other cookware material—and even heat retention is the key to deep frying. This isn't just marketing speak—it's physics at work.
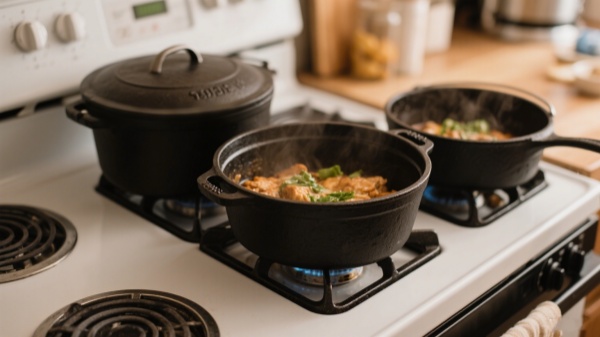
Picture this: you drop a batch of cold chicken into hot oil. In a thin pot, that temperature plummets faster than a stone in water. But cast iron? It barely flinches. If the oil heats up or cools down too fast—which often happens with thinner cookware materials—your food will either fry too quickly (which means the outside will be burnt before the inside is cooked through), or too slowly (which means soggy chicken, fries, etc).
The Raw vs. Enameled Debate
Uncoated cast iron demands respect and care. You'll need to maintain its seasoning, treating it like the heirloom it might become. Each frying session actually improves its non-stick properties—think of it as cookware that gets better with age. With time, use, and plenty of cooking fat, your skillet will develop a shiny, non-stick coating.
Enameled cast iron, on the other hand, arrives party-ready. No seasoning required, easier cleanup, and available in colors that'll make your kitchen Instagram-worthy.
Stainless Steel: The Modern Workhorse
Don't overlook stainless steel for your frying adventures. While it won't retain heat quite like cast iron, it brings its own advantages to the table. The following oils have a high "smoke point" and are recommended to use for deep frying: olive, peanut, canola, corn, grape seed, safflower, sunflower, and vegetable. Stainless steel won't react with any of these oils, maintaining their freshness longer than reactive materials.
Professional kitchens often favor stainless steel for its durability and ease of maintenance. Many models (like 3-ply stainless steel) feature aluminum cores in their bases, combining stainless steel's durability with aluminum's superior heat distribution. This hybrid approach gives you responsive temperature control without sacrificing longevity.
Carbon Steel Woks: The Versatile Performer
A carbon steel wok isn't just for stir-frying—it's a deep-frying powerhouse waiting to be discovered. The curved sides naturally guide food back toward the center, and you'll use less oil than in a traditional pot. If you add too much food at a time or if the items are cold then that will drastically reduce your oil temperature. A wok's shape helps maintain temperature even when adding ingredients.

Think tempura, spring rolls, or wontons—foods that cook quickly and benefit from easy maneuvering. The sloped sides make it simple to move food from the hottest oil at the bottom to slightly cooler zones higher up, giving you precise control over the cooking process.
Electric Deep Fryers: The Convenience King
Sometimes you just want to set a temperature and forget about it. If you're using a tabletop electric fryer, frying is as easy as setting the temperature and waiting until the pre-heat light illuminates. Electric fryers excel at maintaining consistent temperatures without constant adjustment.
The trade-off? They're unitaskers. That electric fryer won't braise your short ribs or bake your sourdough. Plus, cleaning can be a production—disassembling baskets, draining oil, scrubbing every nook. But if you're frying weekly and value consistency over versatility, they're worth considering.
Choosing Your Perfect Deep Frying Vessel: A Detailed Guide
Size Matters: Finding Your Sweet Spot
Let's talk capacity. Your household size directly impacts your ideal pot size, but it's not just about feeding everyone—it's about cooking efficiently and safely.
| Household Size | Recommended Capacity | Ideal Uses | Oil Amount Needed |
|---|---|---|---|
| 1-2 people | 2 quarts | Small batches, appetizers | 2-3 cups |
| 3-4 people | 4 quarts | Family dinners, meal prep | 4-5 cups |
| 5+ people | 6 quarts | Entertaining, batch cooking | 6-8 cups |
Remember this golden rule: Use a wide, heavy pan or pot and don't fill it more than 2/3 with oil. That remaining third isn't wasted space—it's your safety margin.
When choosing a frying pan size to fry in, you want something deep so the oil won't spill over. You also want a large amount of surface area so you don't crowd the pan, and you won't have to work in small batches. It's a balancing act between capacity and practicality.
Material Selection: Beyond the Basics
The Cast Iron Advantage
Once hot, cast iron maintains temperature like a thermal battery, barely registering when cold food hits the oil.
But here's what nobody tells you: cast iron takes patience. It heats slowly and unevenly at first. Give it time, let the heat distribute, and you'll be rewarded with the most consistent frying temperature possible.
The Coating Conundrum
Modern ceramic coatings have revolutionized non-stick cooking. Unlike traditional PTFE coatings that can degrade at high temperatures, quality ceramic coatings handle the heat of deep frying without breaking a sweat. They're typically made from sand-derived materials and water—no toxic chemicals in sight.
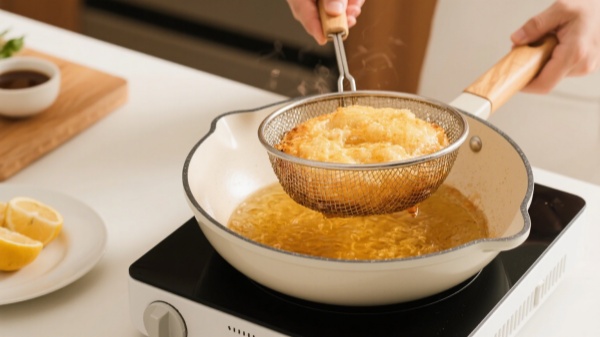
However, traditional PTFE (Teflon) coatings tell a different story. While the Good Housekeeping maintains they're safe for normal use, they start breaking down around 500°F. Since deep frying happens at 350-375°F, you're operating close to that danger zone.
Emerging Technologies
Titanium-reinforced cookware represents the cutting edge—literally. These surfaces are 300% harder than stainless steel, creating virtually indestructible cooking surfaces. The lotus-effect inspired patterns pressed into the titanium create natural hydrophobic properties, delivering non-stick performance without traditional coatings.
Matching Cookware to Your Cooking Style
Your frying frequency should guide your investment. Frying multiple times weekly? Invest in quality cast iron—either raw or enameled based on your maintenance preferences.
Weekend fryers might prefer stainless steel's lower maintenance requirements. No seasoning, dishwasher-safe (though hand washing extends life), and versatile enough for other cooking methods. The aluminum-core varieties offer nearly cast-iron-level heat retention without the weight.
Occasional fryers, consider this: a quality 5-quart stainless steel pot serves double duty. It's your pasta pot on Tuesday, your stock pot on Sunday, and your fryer when the craving strikes. Versatility trumps specialization when storage space is precious.
Mastering the Art of Deep Frying
Oil Selection and Temperature Science
Not all oils are created equal. The following oils have a high "smoke point" and are recommended to use for deep frying: olive, peanut, canola, corn, grape seed, safflower, sunflower, and vegetable.
Temperature Management: The Key to Success
Most deep frying starts with oil between 325 and 375 degrees, but the temperature drops when food is added. Once the oil recovers some heat, it should remain somewhere between 250 and 325 degrees (depending on your recipe) for the duration of cooking.
A clip-on thermometer isn't optional—it's essential. A deep fry or candy thermometer is definitely a must have when it comes to home frying. Without it, you're flying blind, relying on guesswork that leads to inconsistent results.
No thermometer? In a pinch, try these methods:
- The bread test: Drop a small cube of bread into the oil. If it browns in 30-35 seconds, the oil is about 160 degrees Celsius.
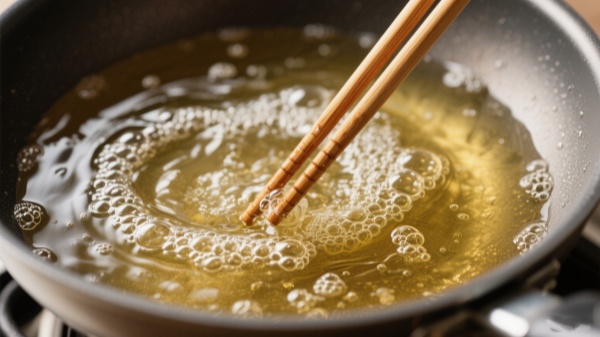
- The chopstick method: Insert a wooden cooking chopstick into the oil and watch for bubbles to appear around it. Steady, vigorous bubbling indicates proper temperature.
Food Preparation: Setting Up for Success
Moisture is the enemy of crispy frying. Always dry off your food (with kitchen towel) before putting it in the oil. This isn't just about preventing splatters—water turns to steam instantly in hot oil, creating barriers that prevent proper crisping.
Avoiding Common Pitfalls
Overcrowding ranks as the number one mistake. Do not crowd the pot. Adding too many pieces of food at once will significantly lower the temperature, causing your food to absorb more oil. Remember, your ingredients should take up no more than about half of the oil surface area at any one time.
Maintenance and Oil Management
Daily Cleaning Routine
The key to longevity lies in proper maintenance. After each use, allow everything to cool completely—patience here prevents both injuries and equipment damage. For cast iron, avoid soap unless absolutely necessary. Instead, use coarse salt as an abrasive with a small amount of oil, scrubbing gently to remove residue.
Stainless steel tolerates more aggressive cleaning. A paste of baking soda and water tackles stubborn spots without scratching. For truly stuck-on residue, simmer water with a tablespoon of baking soda for 10 minutes, then clean as normal.
Oil Recycling and Storage
Quality frying oil deserves a second (or third) life. Let the oil cool to room temperature, then strain it into a container and refrigerate until you're ready to fry again. The oil can be reused multiple times; we like to use one batch of oil for frying savory foods, and another for frying sweet foods, as the oil will take on some flavor every time you use it.
Responsible Disposal
When oil reaches the end of its useful life—dark color, off odors, or excessive foaming—disposal requires thought. Never pour oil down drains; it solidifies in pipes, causing expensive blockages.
Advanced Techniques and Pro Tips of Deep Frying Cookware
The Double-Fry Method
Want restaurant-quality French fries? To cook French fries, it's best to heat your oil or fat to 160°С, then add in your potato chips. They should cook for 3-4 minutes at this temperature, and then you can increase it to 180°С for a further 3-4 minutes.
This two-stage process creates the perfect fry: fluffy interior, shatteringly crisp exterior. The first fry cooks the potato through; the second creates that addictive crunch. It works for chicken too—lower temperature to cook through, higher to crisp the coating.
Coating Strategies
The best fried foods balance crispy coating with moist interior. Standard breading follows a three-step process: flour (for adhesion), egg (for binding), breadcrumbs (for crunch). But here's where creativity enters.
For epic crunch, I like combining potato starch or cornstarch in with flour and dipping my ingredient in a wet component like buttermilk, then dry, then wet, and dry again to create a nice thick crust. This double-dipping technique builds layers of crunch that shatter at first bite.
Tempura takes a different approach—ice-cold batter hitting hot oil creates violent bubbling that forms a light, lacy coating. The temperature differential is key; keep batter over ice until the moment of use.
Troubleshooting Common Problems
Signs of Success:
- Golden-brown color developing evenly
- Vigorous but controlled bubbling
- Food floating to surface when done
- Clean, neutral oil smell
- Crispy exterior, fully cooked interior
Warning Signs:
- Excessive smoke or acrid smell
- Food browning too quickly outside
- Oil foaming excessively
- Greasy, oil-logged results
- Uneven cooking or cold spots
Never overcrowd the pan, which can cause the oil temperature to drop too low. Low oil temps not only take longer to cook, but they can also make your fried food taste soggy. When troubleshooting, temperature control solves 90% of problems.
Conclusion: Your Deep Frying Journey Begins
Choosing the right cookware for deep frying isn't about finding the most expensive option or the latest gadget. It's about matching your needs—frequency of use, storage space, maintenance preferences—with the right tool. Whether you opt for a generations-lasting cast iron Dutch oven, versatile stainless steel, or specialized electric fryer, success comes from understanding your equipment and respecting the process.
The cast iron Dutch oven that started my journey still sits in my kitchen, seasoned by thousands of frying sessions. Yours is waiting to begin its own story. Choose wisely, fry safely, and enjoy the crispy, delicious results of your newfound expertise.

Solamex — Wholesale Pots and Pans Expertise
Solamex offers a comprehensive range of wholesale pots and pans, combining durable materials, precise craftsmanship, and flexible product customization. From premium stainless steel to advanced nonstick lines, our catalog is built for both retail distribution and demanding commercial kitchens — ensuring consistency in performance and presentation.
How to Choose an Induction Cookware Pan — Compatibility, Materials & Buyer's Guide
Cookware for Deep Frying: The Practical Buyer’s Guide to Pots, Pans, Safety & Long Life